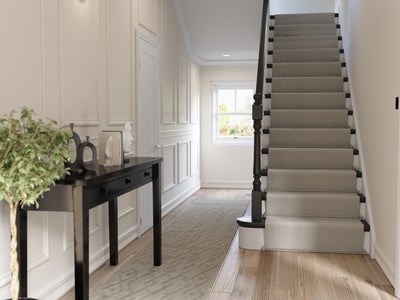
The Big Event! Offers on Paint, Flooring, Doors & more
Skip to content Skip to navigation menu
Basket
0
squeaky_stairs_2.jpg

If you have ever walked up a flight of stairs and felt each and every one of them creak beneath your feet, you know they’re probably due a bit of TLC. It’s a minor issue that’s easy to overlook, but many homeowners will likely have to deal with it at some point or another. The good news is that, in most cases, it is a problem that is relatively easy to fix. Below, we will take a look at some of the most common causes of squeaky stairs and what you can do to fix them.

squeaky_stairs_3.jpg
Causes

Stairs will normally start to squeak and creak due to wear and tear over time, where one wooden section rubs against another, or against a nail or screw - it’s nothing out of the ordinary. While it’s usually just an annoyance and not a symptom of a more serious problem, it’s always worth fixing it before it gets worse. It could also be that the timber treads are starting to shrink, or the adhesive between the tread and riser has come loose. Before you get to work, first try and locate the site of the creaking to help determine where the issue lies.

squeaky_stairs_4.jpg
Lubricating joints

One of the simplest ways you can fix it is by lubricating the joints. You’ll need to fill the crack between the tread and riser with a lubricant such as talcum powder. Try to avoid oil-based products, as they can turn the wood sticky with dust and create more problems further down the line. Pour the powder onto a paintbrush and carefully apply the brush as deep as you can into the area. It won’t stop the wood from moving but the powder simply acts as a barrier between the tread and the riser, reducing friction and therefore stopping any noise.

squeaky_stairs_5.jpg
Squeaking

If you’re noticing squeaking at the front, try tightening up the fitting between the tread and the riser by screwing down the treads. First making sure the screws in the treads are securely fitted to the risers. If they already are and there’s still squeaking, drill three evenly spaced pilot holes across the tread where it meets the riser. Then drill in three screws to secure the tread and the riser nice and tight. Make sure to drill the screws in slightly below the surface of the tread and fill in with a bit of wood filler to hide the screws and even the surface with sandpaper.

squeaky_stairs_6.jpg
Loose treads

If it’s the back of the stairs that are creaking, then the tread might have come loose from the stringer. The stringer is the saw shaped wood on the side of the stairs that covers the stair cavity. Make two pilot holes on the edges of the tread close to the wall. Space them about two inches apart and then make pilot holes at opposing 45° angles, so that the nails are aimed away from each other. Repeat this on the opposite side by the balustrades. Once you have drilled your pilot holes on each side, hammer in your nails into the holes at the same 45° angles. This will tighten everything together and will help stop the treads from coming loose in future. To finish off, cover the holes with a small amount of wood filler before painting over it.

More inspiration