Skip to content Skip to navigation menu
Basket
0
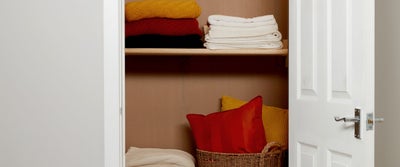
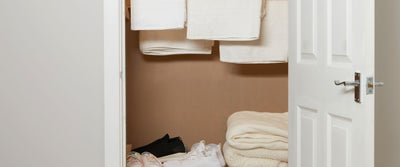
  • Primarily used to house hot water tanks and even combi boilers, airing cupboards are often an underutilised storage space. If you’re short on storage or without a utility room, an airing cupboard with fully flexible and custom shelving is ideal. Air duvets, store boxes and hang your linen, washing and towels to warm through, out of sight.
  • Our step by step instructions have been designed as a guideline to make one large airing cupboard shelf. This bracket system is designed to hold wooden dowels that you can easily reconfigure if you need to hang a bulky duvet or support a heavy storage box.
  • We used Whitewood PSE and light hardwood dowel for this build, but you can experiment with other structural materials and finishes for different looks.

Installing shelving in airing cupboard with a working boiler or tank

  • If your airing cupboard still has a hot water tank or combi boiler in, it’s vital that your shelving doesn’t prevent access for servicing. Safe ventilation and good airflow between your hot water tank or boiler and storage area is also vital. You should allow for good clearance to ensure air circulation is efficient. We recommend seeking professional advice to ensure that your spaces meet UK regulations.
  • Consider the tolerance, runout and alignment of your power saw blades when making cuts. Depending on the tolerance of your tools, you may find that dimensions are adjusted by approximately 3mm. We recommend marking the brackets after cutting them in half, to indicate which is slightly larger and will comfortably hold the dowel.
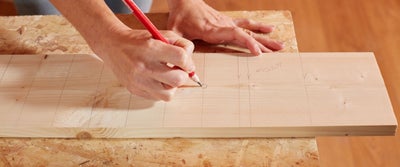
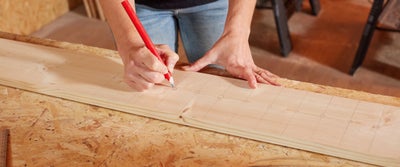
  • As we worked on one long length of timber making multiple markings, we recommend using a pencil to mark through zones as a visual guide. Crosshatching an area that you shouldn’t work in, or circling drilling holes where lines intersect can be especially helpful.
  • A chop saw or circular saw will ensure that your timber is cut accurately with precision speed. If you don’t have access to power tools, this project can also be completed with a universal saw. Ensure your timber is securely clamped, then slowly cut along your scored line with a clean and sharp saw blade.
  • Always ensure that your construction area is well-lit and ventilated to prevent the inhalation of or irritation caused by dust and debris.


Measuring up

View instructions

As you will be securing the brackets to the walls of your airing cupboard, it’s vitally important that you check the walls for wires, cables and pipes. Use a digital detector to track and mark placements before you make any holes or attempt fixings.

Begin by measuring the depth and width of your airing cupboard with your tape measure. Decide on how deep you would like your shelves to be, then make a note.

1.Airing_Cupboard_Measuring_Up.jpeg

You may find as is common with cavity spaces, that it isn’t quite square and can even taper in width from the front to the back of your cupboard.

Preparing the timber

View instructions
2.Preparing_The_Timber.jpeg

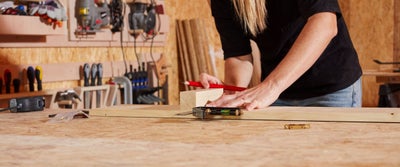
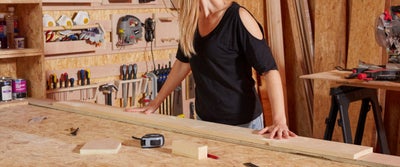
Place your 18 X 144mm length of whitewood PSE on your workbench. We chose to work from either end of our timber length to create the brackets, but there is no one right way to do this. If you decide to work on shorter lengths of timber, make sure to add at least 100mm to either end of your measurement, as these areas will be used as excess wastage zones.
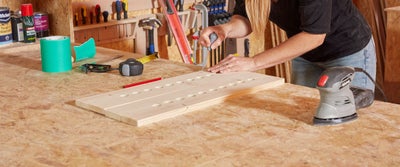
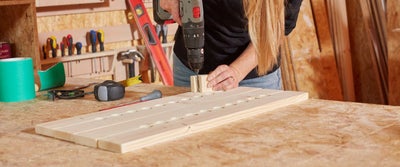
You will also need a 44 X 44mm spacer when it comes to measuring out notch holes. Using a spacer rather than measuring identical spaces can help increase accuracy and speed. If you prefer, you can use a tape measure and pencil to mark each interval. If you choose to use a spacer as we did, cut it to size before starting the construction.
3.Measuring_timber.jpeg

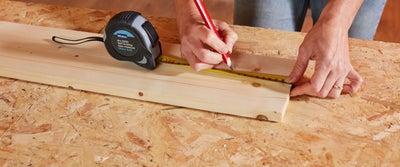
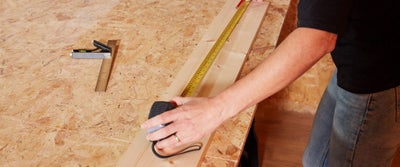
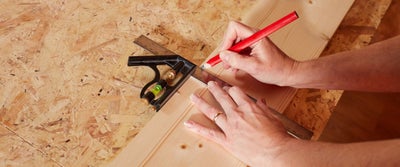
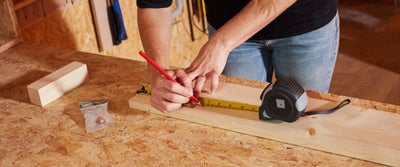
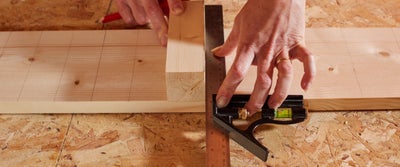
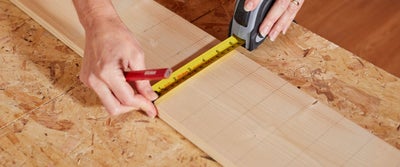
Begin by marking your excess wastage zones on your timber length. Using your tape measure, measure in 100mm from each end of your timber and mark with a crow’s foot.

4.Measuring_timber.jpeg

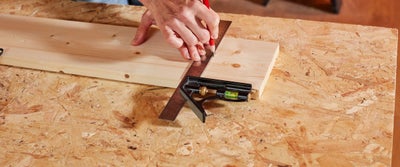
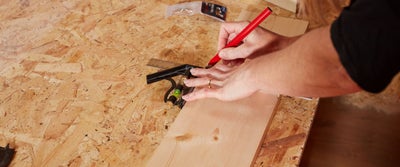
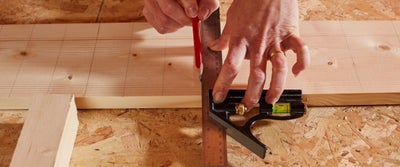
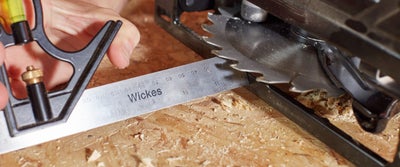
Then using your combination square, scribe a straight line across the width. Anything inside this 100m line is for wastage, as it will be used for clamping and screwing the timber to your workbench.

5.Preparing_timber.jpeg

We recommend using a pencil to make crosshatch markings through these zones as a visual reminder.

6.Measuring_timber.jpeg

Taking the shelf depth dimensions from your airing cupboard, measure from the 100mm line towards the centre of the length and mark the first measurement.

7.Measuring_timber.jpeg

Scribe the marked measurement across the width with your combination square, then repeat from the other end of the bracket, marking as before from the 100mm line.

The 100mm and marked lines will be cut through later on to create the brackets.


Depending on the depth of your space and the length of your timber, you may find that you are left with a wastage zone in the centre of your timber, which you can also crosshatch. You will be able to drill through this zone at a later stage, securing the timber to your workbench.

Marking the locking block locations

View instructions

We chose to use ball catches to secure our brackets together, but there are many types of catch and lock that you can use for this project. These catches will be screwed to a locking block that will overlap at either end of the bracket.

8.Measuring_timber.jpeg

Starting at one end of your timber, place your ball catch approximately 20mm inside the first 100mm wastage line, then use your tape measure to mark 20mm away from the outside of the ball catch. Scribe a straight line across the width with your combination square.

Repeat at the other end of your first marked length within the internal line, so either end of your first marked length has a locking block zone for the ball catch.

Now repeat both markings at the other end of your timber within the second marked length, so you have a total of four locking block zones.

Marking the notch holes

View instructions

Starting from one end of your timber, line up your flat wood bit so one side of the spur is against the first locking block zone.

9.Masuring_timber.jpeg

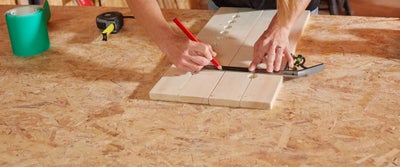
Make a small pencil mark at the centre of the tip on the timber then use your combination square to scribe a straight line through the mark. This will be the location of your first hole.

10.Measuring_timber.jpeg

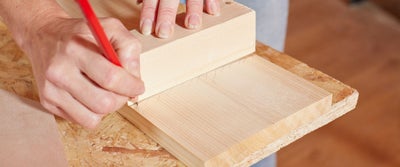
Now, using your 44 X 44mm spacer, line up the edge with your first hole location line. Use your combination square to check the edge of the timber is true, then scribe a line across the width of your timber.

11.Measuring_timber.jpeg

Now move your spacer along, aligning it with the previous line and scribing the next until you reach the locking block zone at the other end of the first bracket.

12.Marking_timber.jpeg

Repeat for the second bracket, starting at the opposite end of your timber and working towards the middle again.

We were able to mark ten lines for the notches, but this may be different depending on your timber and dimensions.

13.Marking_timber.jpeg

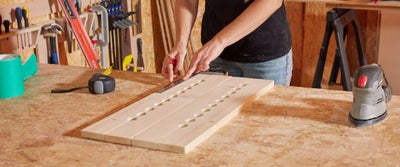
Once all of the notch lines are marked, use your tape measure to find the centre of the width of your timber.

14.Marking_timber.jpeg

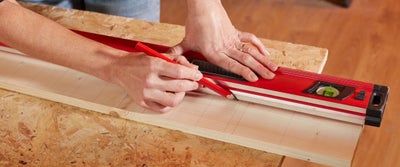
Mark in several places along the length, then using a straight edge such as a spirit level or metal ruler, scribe through the markings.

15.Marking_timber.jpeg

Depending on how you choose to mark the holes on your timber, you may find that the first and last notch hole on each bracket has slightly different measurements from the edge of the timber. To ensure that the dowels are symmetrical when mounted, write the word ‘front’ in the first catch location at either end of your length.

16.Marking_timber.jpeg

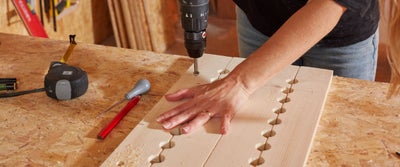
As the timber now has multiple scribed lines, we recommend drawing a small circle to indicate where each drilling hole will be. These are where the ten equally spaced scribed lines on each bracket, intersect with the central marking.

Drilling the notch holes

View instructions

Inspect the cables and blades of your power tools before they are plugged in to ensure they are in good condition. If any of the elements need to be replaced, make sure this is done before construction begins.

For safety, we recommend wearing protective goggles, a dust mask and heavy-duty gloves when using a chop saw or drill.

17.Preparing_timber_.jpeg

Now the timber is prepared, take an offcut length or sheet of timber that you don’t mind marking and place it underneath, on top of your workbench.

18.Drilling_timber.jpeg

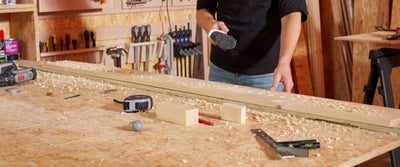
Clamp the offcut to your workbench, then secure your timber by screwing through the excess wastage zones, in the centre and at either end of your length. Ensure the heads of the screws are sunken into the timber.

19.Drilling_timber.jpeg

Use a bradawl to make a small hole into the centre of each of your circled drilling holes. These holes will help to align your drill and prevent the bit from wandering.

20.Drilling_timber.jpeg

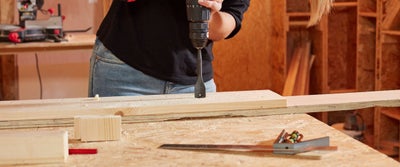
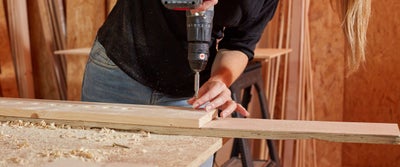
Taking your 90 degree drill jig and a 6mm drill bit, start at one end of your timber and place your drill bit in the first bradawl hole. Butt the jig up against your drill bit, then drill down to pilot the first hole.

Repeat along the length of timber to pilot hole each marking, then give everything a good brush down.

21.Drilling_timber.jpeg

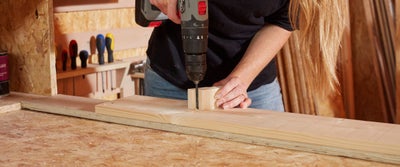
Now replace your 6mm drill bit with the 25mm flat wood bit you used to space the notch lines either. Guide the centre tip of the flat wood bit into the first pilot hole. Holding your drill securely with a firm grip and at a 90 degree angle, drill down through your timber to create your first hole.

22.Brushing.wood.jpeg

Repeat along your timber length until all of the holes are created, then give your timber and workbench and good brush down.

Cutting the length

View instructions

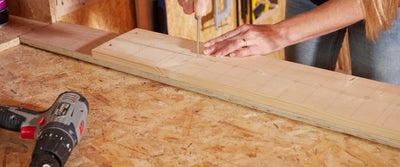
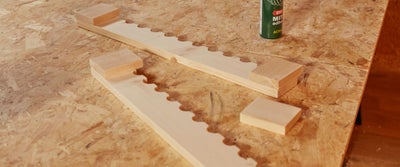
Now that the holes are completed, you can cut the timber length in half to create the two sets of brackets.

23.AiringCupboard_Cutting_Length.jpeg

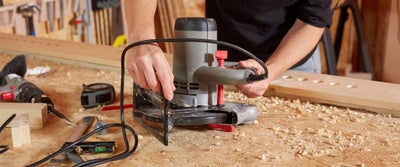
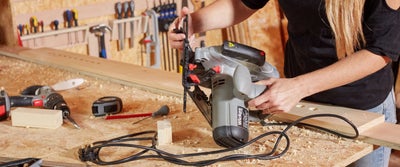
Ensuring your circular saw is unplugged, adjust the depth of the blade to just over 20mm and tighten to secure. This is so you do not damage your workbench or cut through the offcut length too much.

24.Measuring_saw.jpeg

Double-check the measurement, using your combination square or tape measure to measure from the edge of the shoe to the blade.

25.Circular_saw.jpeg

Now insert the track rail into your circular saw. Using the half-width measurement that you scribed along your timber length earlier, adjust and tighten the track rail so it’s the same.

26.Cutting_timber.jpeg

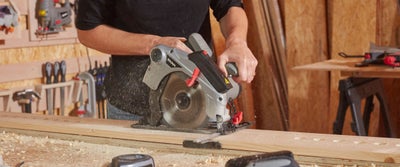
With the track rail running along the edge of your timber, start at one end and slowly cut along the length. This job can be quite dusty, so we recommend wearing protective goggles.

It’s worth noting that due to the thickness of the circular saw blade, the cut notches will vary in size by approximately 2mm. We would recommend making a small mark on the back of the bracket to indicate which piece has the slightly larger holes. Ideally, this will be the bottom bracket as the dowels will fit snuggly in the slightly larger notch.

27.Smoothing_timber.jpeg

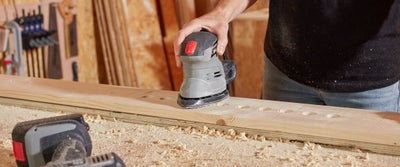
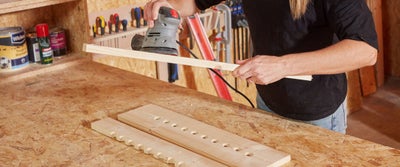
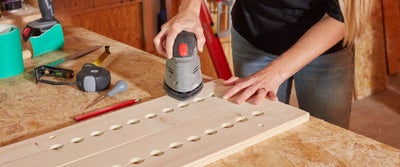
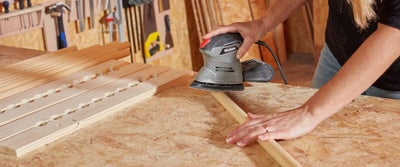
Once you have cut your timber length in half, use your electric palm sander to give the timber a good once over, smoothing away any snagged edges, frays and pencil marks.

28.Drilling_timber.jpeg

Remove the screws at either end and give your workbench a brush and clear down.

29.Preparing_timber.jpeg

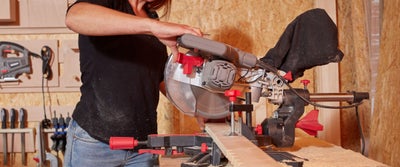
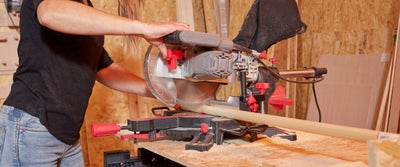
Taking your lengths to your chop saw, clamp the timber in place then cut through on the inside of the 100mm excess wastage zone lines.

30.Smoothing_timber.jpeg

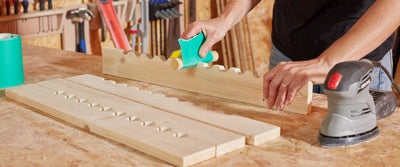
Repeat for the second length so you are left with two sets of brackets, then use your electric palm sander to smooth over your brackets.

31.Smoothing_timber.jpeg

To sand the inside of the holes which have now become notches, you can make a bespoke sanding block by wrapping a piece of coarse sandpaper around a small offcut of dowel. Run the rounded sanding block through each notch to tidy the timber up removing any snags.

Marking the holes for fixing

View instructions

To fix the brackets in place, it’s important that you check the walls of your airing cupboard for wires, cables and pipes.

For a neat finish, it’s preferable for the fixing holes to be at an equal distance from each end of the timber. However, you may have to play around with your fixing holes to avoid electrical wiring and metal pipework.

32.Airing_Cupboard_Marking_Holes_Fixing.jpeg

When you have decided the rough height that your brackets will be mounted at, use your digital detector and run the device over both of your walls tracing the locations of any pipes and cables.

33.Airing_Cupboard_Marking_Holes_Fixing.jpeg

Use a metal ruler or spirit level to mark out any long or usually shaped pipework, so you can easily avoid the area.

34.Airing_cupboard_marking_holes.jpeg

Extend your tape measure to the length of the bracket you’re working on and offer it up to the wall. Working around any markings, decide roughly where the bracket will be mounted and note the dimensions. Remember that there will be a locking block at either end of your bracket, so the fixing marks will need to be further in on the length. We were able to make our fixing holes identical as our pipework did not interfere.

36.Airing_Cupboard_Marking_Holes_Fixing.jpeg

Lay your brackets side by side on your workbench, ensuring they are aligned to one another. Starting at one end, measure and mark your fixing hole locations, using your combination square to scribe a straight line across both brackets.

Repeat at the other end of your timber, adjusting the marking accordingly depending on your space.

Piloting the fixing holes

View instructions
37.Airing_Cupboard_Piloting_Fixing_Holes.jpeg

Line up your metal ruler or combination square with the edge of the timber and use the thickness to make a small cross through the scribed line for your hole locations.

38.Airing_Cupboard_Piloting_Fixing_Holes.jpeg

Then use a bradawl to make a small hole into the centre of each of your marked hole locations. These holes will help to align your drill and prevent the bit from wandering.

39.Airing_Cupboard_Piloting_Fixing_Holes.jpeg

Taking your 90 degree drill jig and a 6mm drill bit, start at one end of your timber and place your drill bit in the first bradawl hole. Butt the jig up against your drill bit, then pilot down through each hole.

40.Airing_Cupboard_Piloting_Fixing_Holes.jpeg

For a neat finish and so the heads of the screws are sunken into the timber, replace your drill bit with a countersink and bevel each hole.

41.Airing_Cupboard_Piloting_Fixing_Holes.jpeg

Run your electric palm sander over the surface again lightly to remove any frayed edges and markings.

Cutting the dowel and locking block to size

View instructions

You can now cut your timber dowel to size. Using your airing cupboard dimensions from earlier, ensuring to account for any length adjustments where your space is tapered or uneven, mark your first piece of dowel.

42.Cutting_Dowel.jpeg

Using your chop saw or universal saw, cut each length to size. If your dowel measurements are identical lengths, you can make a chop saw stock block for accurate and repetitive cuts.

43.Cutting_Dowel.jpeg

For a smooth finish give the cut ends a tickle with your electric sander or sandpaper.

44.Cutting_Dowel.jpeg

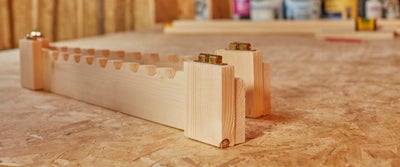
Next, you need to cut the locking blocks that sit at either end of the brackets. This block will affix to the top bracket, slightly overlapping the second bracket with the locking mechanism.

Taking your offcut pieces, measure and mark your timber to create four identical blocks, then cut each to size with your chop saw. The measurement of these blocks will depend on the timber length and catch mechanism you decide to use.

We used a 51mm wide mechanism meaning our blocks were approximately 40mm wider than the catch and 20mm longer than the width of the top bracket.

45.Cutting_Dowel.jpeg

Using mitre adhesive, apply a thin layer of glue to the back of the stop block, spraying activator directly to the locking block zone at the end of the top bracket.

Hold the block in place so the overlapping end is the same side as the notches, then give the block another spray with the activator to secure.

Repeat at the other end of the bracket and on your second top bracket too.

46._Cutting_Dowel.jpeg

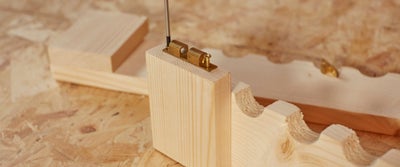
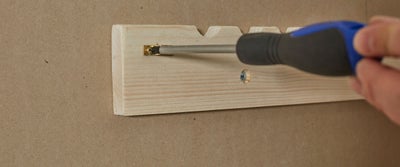
Taking your ball catch mechanism and a screwdriver, screw the catches to the centre at each overlapping end of the locking blocks.

Fitting the brackets

View instructions
47.Fitting_Brackets.jpeg

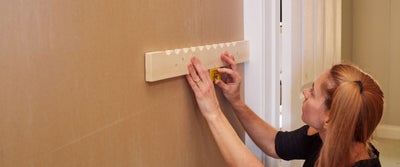
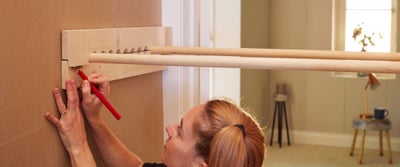
Once you have decided on the rough height that your brackets will be mounted at and your walls are sufficiently marked to avoid pipework areas; offer up your first bottom bracket into position. Remember to double-check that the brackets are the correct way around so both front ends are facing the same way.

48.Fitting_Brackets.jpeg

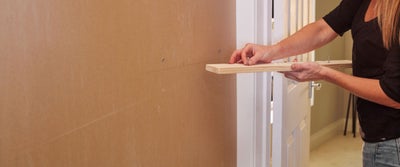
Use a spirit level to check that it’s straight, then scribe a line underneath the bracket.

49.Fixing_brackets.jpeg

Holding your bracket firmly in place, use your bradawl to make a mark through each of the fixing holes.

Depending on the kind of walls you have in your airing cupboard, you may need to purchase specialist wall plugs for mounting your brackets. We used specialist self-piloting plasterboard wall plugs.

50.Fitting_Brackets.jpeg

Using your drill, screw each self-piloting wall plug into place.

Measure from the floor to your scribed bracket line, then repeat this process in the same way on the opposite wall with your second bracket.

52.jpeg

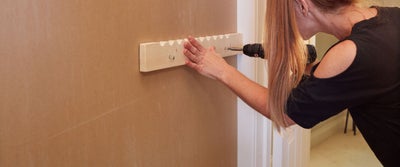
Twist the fixing screws in a little by hand through the countersunk holes of your first bracket then offer it up to the wall.

52.Fitting_Brackets.jpeg

Ensuring it’s aligned to the scribed mark, use your drill to tighten the screws securing the bracket into place.

Repeat, to fix your second bottom bracket in place on the parallel wall.

Fitting the dowels and ball catch counterpart

View instructions
53.Fitting_Dowels.jpeg

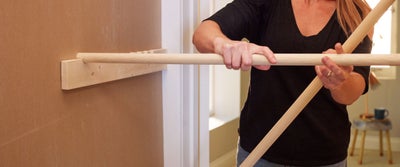
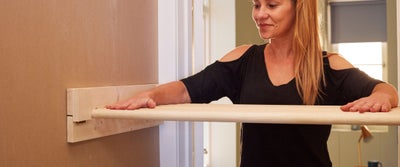
Now your brackets are secure, you can place your dowels into the notches and decide on your preferred configuration.

54.Fitting_Dowels.jpeg

Place your first top bracket on top of the lower bracket and dowel lengths. Take a pencil and make a couple of small marks onto the lower bracket to indicate where the centre and bottom of each catch sits. This is to ensure the counterpart is secured perfectly in place.

Ensure that your dowels are in place for this step otherwise the counterpart catch won’t be aligned. Repeat for each of the locking blocks.

55.Fitting_Dowels.jpeg

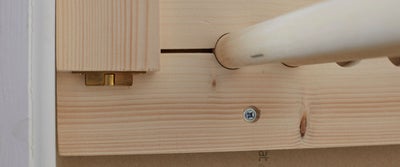
Line up your catch counterpart with the scribed line and central mark then screw each into place.

56.Fitting_Dowels.jpeg

Repeat for each of the locking blocks, then replace the top brackets, slotting the catches into the locks.

57.Fitting_Dowels.jpeg

And that’s it, your airing cupboard rail shelving is complete! A great way to make the most of your spaces, hide, hang and store your odds and ends safely out of sight.

Aftercare

View instructions

The beauty of this rail-style shelving system is that you can reconfigure the dowels at any time.

Utilise every dowel to support full storage boxes or hang slightly damp towels over the rails to dry. If you need to air a bulky duvet and blankets or need a makeshift coat cupboard when the house is full, simply reconfigure the dowels to suit your requirements.

If you make your shelving to slot around a hot water tank or combi boiler, ensure that there is good clearance from your stored goods at all times. This will ensure there is sufficient airflow and will prevent any stored textiles from becoming musty.

Get creative with your airing cupboard shelving

View instructions
58.Airing_Cupboard.jpeg

Using this guide, make multiple shelves to best utilise your space. Once the brackets are mounted to the wall, you can simply reconfigure the dowels or remove them altogether for full flexibility.

Make half-depth shelves for shoes or fill your space with full-sized shelving for the most versatile storage options.

Experiment with different bolts, catches and locks to find the best locking system to suit your space.

Try varnishing the brackets and dowels to protect and strengthen the timber or give everything a good coat of primer before applying your favourite colour. Spray painting the dowel lengths using long sweeping motions can help you achieve full coverage.

Airing cupboard shelving inspiration

View instructions
59.Airing_Cupboard.jpeg

Having bespoke airing cupboard shelving gives you great storage flexibility for organising and storing items out of sight.

Use your airing cupboard as a drying rack. Hang slightly damp clothes or almost dry items from the tumble dryer, over the rails to air.

Remove dowels as needed and configure the rails to hang seasonal clothes and coats that won’t fit into the wardrobe.

Depending on where your cupboard is located, you can also utilise the space as a shoe cupboard. Add baskets to house the families collection and rest assured that damp boots will warm through and dry properly.

Get organised with storage boxes. Sort through your odds and ends and label clear boxes for the most efficient use of space. A great home for the Christmas decorations or surplus bathroom supplies.

Neatly house your folded linen, towels, blankets and duvets for easy access.

Add above a washing machine or tumble dryer in a utility room if you have one.

60.Airing_Cupboard.jpeg

More inspiration from Wickes