Constructing sleeper stairs

Perfect for strong, durable builds with a contemporary look, timber sleepers are a fantastic alternative to traditional materials for building garden steps. Whether you’re replacing existing steps or fancy creating zoned outdoor spaces for easy access to the patio, decking or grass, the design options are endless and entirely bespoke to your garden.

Durable, strong and versatile by nature, the way you use timber sleepers in your garden will depend entirely on your space, design and needs. Available in a wealth of shapes and sizes, sleepers are a great landscaping choice as they form the riser and tread of each step without the need for many additional materials.
Try using sleepers to maximise their width and length as a simple step up or down to grass or build frames to maximise the height, creating deep steps with a gentle slope.
Once you’ve decided on your design, it’s a good idea to draw up a plan and work out the dimensions of your steps for the materials you’ll need. To work out the number of steps you’ll need, divide the total height of your incline by the riser height of your sleeper. You can also find a number of handy tread-to-riser conversion calculators online, which will give you suggested dimensions for comfortable stairs. It’s best to keep the rise of your steps as consistent as possible, but you may find that the tread varies a little depending on your space.
Sleepers are best cut at home with a circular saw, so it’s worth creating a cutting list to reduce waste and make the process as streamlined as possible.
As sleeper steps are partially submerged, we recommend using hardwood sleepers for their long life and durability against decay. If you choose to use softwood sleepers which are a more budget-friendly option, we recommend treating the timber with suitable finishes and maintaining the wood as necessary to prevent wear.

Once you have your design and materials ready, you can begin preparing your build area. We think it’s a good idea to mark out the entire space for your steps using marking paint or a chalk measuring out tool along with wooden stakes for accurate levels.
If you’re laying a sleeper length in place as a simple step, it’s not always necessary to submerge the timber, however, for two or more steps you should dig suitable trenches to support your build.
Depending on the height of your steps, you may choose to set the first frame in a concrete footing.
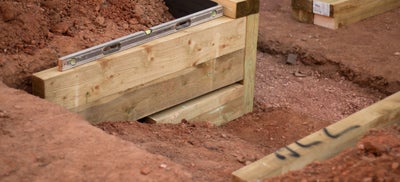
Depending on how many steps you’re building, you should excavate a shallow trench at a time, laying each frame for a bespoke fit. You may either choose to excavate soil at either side of your step so the sides of your frame slot into the earth; or use your shovel to excavate the soil, shaping rough stairs that the frames will then sit on.
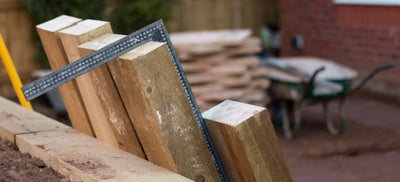
Whether you’re building simple steps or a rising frame of stairs, you’ll need to cut your sleepers to size. Ensure you are wearing protective workwear, then measure, mark and scribe each sleeper with a quick square before cutting to size with your circular saw. For any unreachable centre sections that your saw can’t reach, you can use a universal handsaw. If you’re building curved steps, you’ll need to measure and cut the side lengths, so they are bespoke to your space.
To join the step frames you’ll need to create a U shape, securing two of the right-angled corners with at least two timber fixings. We recommend using heavy-duty exterior timber screws for garden landscaping. Make sure you choose fixings that are approximately a 1/3 longer than the depth of your sleepers, so they sufficiently enter the join for a secure hold. If you choose to work with hardwood sleepers you will need to pilot each fixing hole first and use stainless steel timber screws to avoid natural tannin corrosion.
For added protection against rot and decay, we recommend generously brushing cut ends and untreated timber with wood preserver before leaving to dry.

Begin by slotting the first frame in or onto your prepared trench. This will be heavy so you may need another pair of hands around. If you have used a concrete footing, you should allow this to dry for at least 24 hours before you begin securing the frames.
When you’re happy with the fit, excavate the trench for the second frame, so the base sits snuggly on the first and the side lengths are submerged into the earth.
Use your tape measure to check your dimensions and the tread of the step, then use a spirit level to ensure the cross length is perfectly level. It’s a good idea to allow each step to slope slightly downhill to allow for water run-off if you can.
Continue excavating each trench and layering the steps until you are happy with the incline of the structure.
Remember to use your spirit level to check that each frame is level and straight as you work. Use small timber offcuts, paving slabs or concrete blocks to level things out for the perfect incline.

Once everything is in place, you’ll want to secure each step to one another to ensure there is no movement as the ground settles. This can be done in any number of ways.
Drive picket stakes into the ground on the inside of each frame, then drive a fixing through the back of each picket and into the sleepers for added support.
Where the sides of your steps run on top of each other, use an offcut of timber or fixing plates to join them together.
Hammer multi-purpose steel rods down through each layer of steps to secure the frames to one another. If you’re working with hardwood, you’ll need to pilot the holes first with an auger bit that’s the same diameter as your steel rods to aid insertion.
For additional strength inside the right angle joints, angle brackets offer further support and can be fixed in place with timber screws. Available in a huge choice of sizes, we recommend going for fixings that are as large as possible to prevent any shifting.

Once you’re happy that each step is in place and secure, it’s time to fill the stairs for good drainage. We recommend filling each step with a layer of hardcore rubble, then layering an even amount of sub-base. Use your shovel to spread the materials then compact well with a tamper or an offcut of your sleeper.
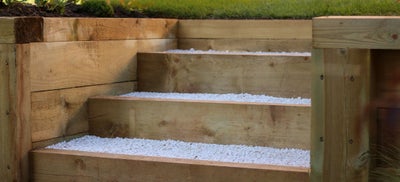
The top of your steps can be completed in a number of ways depending on your budget and preferred look. Go for bark chippings, decorative stones or gravel for an easy DIY finish, or if you’re feeling confident, paving slabs or outdoor tiles make for a sleek look.
Sleeper steps can become slippery over time when wet. To combat this, you may choose to pressure wash the steps regularly to clear any grime and dirt; try sprinkling coarse grit sand over the surface; cutting shallow notches into the tread for added grip, or stapling wire mesh to each step.
For a longer life against rot, wear and decay, it’s worth treating your steps with a finishing product such as stain, oil or varnish. Depending on the type of sleeper you use, you can also find products with added UV protection and enhanced water-resistant properties.
