Skip to content Skip to navigation menu
Basket
0

Planning & preparation

  • We are going to show you how to make decorative concrete stools step by step.
  • DIY concrete stools make for a fun weekend project and are a great addition to your home. Add some trendy and bespoke décor that has a range of uses from end tables to plant stands.
  • Our step by step instructions are designed as a guide to give you a range of ideas, tips and techniques to create your own concrete stools.
  • These concrete stools are completely custom to your space, style and the design you choose to go for. Simple and cost-effective to make, once you have the concrete mix, you can even utilise materials from around your home.
  • There are many types of concrete available for DIY projects. For this project, we used a rapid-setting mix and a selection of plastic and silicone buckets, but you can try different mixes and containers for various looks.
  • When it comes to the legs, feet and decorative touches, this project has lots of room for creativity. We used timber dowel legs, copper coupling and a range of different finishes including varnish and paints.
  • Depending on what you already have to hand, the materials for this project will cost under £20 per stool and take a DIYer with moderate skill approximately 2 hours to construct. We recommend allowing a weekend to complete this project, to allow for curing and decorative dry times.

Doing it right

  • If you don’t have access to a chop saw, you can use a universal saw to cut the timber legs. Ensure your timber is securely clamped, then slowly cut through your scored line with a clean and sharp saw blade.
  • The mixing ratios and cure times will vary depending on the type of concrete and manufacturer mix you go for. Be sure to check the packaging for instructions before starting work.
  • When you have decided on how thick you want your stools to be, it can be a good idea to measure out the correct quantity of cement mix to water and have these ready to pour. If you choose to work by eye, have a little extra of each material to hand, as you will need to work quickly once you start mixing.
  • You can set concrete is anything that has a solid structure and isn’t porous. We recommend using plastic containers or silicone buckets as they offer some flexibility for removing the set stool. If your container isn’t pliable enough, you can run the risk of cracking the concrete on removal.
  • There is no one right way to set the legs into the concrete. Go for equally spaced legs or bunch together and angle out from the centre for a wider base. This guide will show you several different setting techniques including using masking tape, templates and frameworks.
  • We used an old plant pot to make our setting template, however, you can use whatever you have to hand. Try using a recycled bottle or tin, or if you’re feeling ambitious, make a template that’s the same diameter as your container for slotting the dowel through for precise placement.
  • If you find there’s cement residue left in your container after you remove the stool, you can either sand it away or repurpose the container for a new life.
  • Watch our top tip videos for our Wickes DIY skills, tips and advice.

Staying safe

  • Cured concrete can be quite heavy depending on how large you take your design. We recommend having another person around to help with removing the stool and lifting it onto the workbench.
  • Working with concrete is dusty work. For safety, we recommend that you wear a dust mask, goggles and gloves when handling the mixture.
  • Always ensure that your working space is well lit and ventilated, especially when working with machinery and decorative finishes.
  • Always check the manufacturer’s label before applying any paints, stains or treatments.
Gathering materials

View instructions

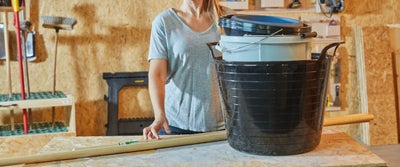
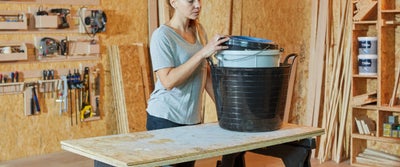
Begin by placing your concrete stool items on your workbench.

1.Gathering_Materials1.jpeg

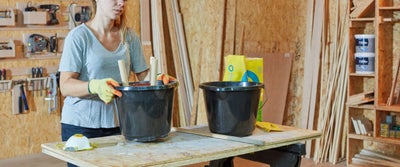
Gather a selection of containers for mixing or setting. We recommend using plastic or silicone buckets for setting your concrete, as they offer some flexibility for removing the set stool. If the bucket isn’t pliable enough, you might end up cracking or damaging your concrete when you try to remove it after it sets.

2.Gathering_Materials.jpeg

Choose your timber dowel for the legs. You can use what you have to hand or work with varying diameters for different looks. We worked with both 18mm and 28mm dowels but the choice is yours.

3.Gathering_Materials.jpeg

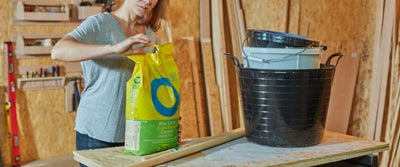
Locate your bag of concrete and an offcut or object for stirring. You should also fill a container with water or have access to a nearby water source.

Cutting the legs

View instructions
4.Concrete_stools.jpeg

The design and quantity of stool legs you go for will depend on the style of stool you want to create. Decide whether you’re going to evenly space the legs or angle out from the centre of the stool creating a wider base.

To decide on the length of your stool legs, it’s a good idea to offer up the dowel to your chosen container. When the legs are set into the concrete they will touch or be close to the bottom, so ensure that you add the approximate concrete depth to your measurements. We found that three 300mm legs work well as a low-level stool, while four 750mm legs make a great plant stand or end table.
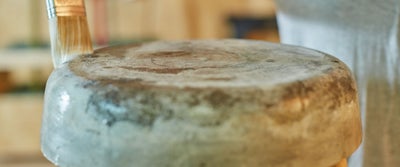
Use your tape measure and a pencil to mark each of your dowel lengths with a cutting line, then cut each to size using your chop saw or universal saw.

5.Concrete_Stool_Cutting_The_Legs.jpeg

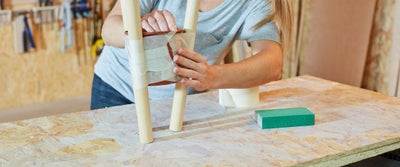
Use an angled sanding block or small sheet of sandpaper to smooth down the cut ends, removing any rough edges.

Creating the setting template

View instructions

There’s no one way to set the concrete legs but you will want to ensure they are secured, so it’s a good idea to have some masking tape to hand. We experimented with several setting styles to achieve different looks.

6.Building_concrete_stool.jpeg

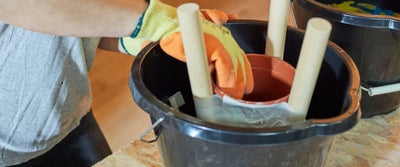
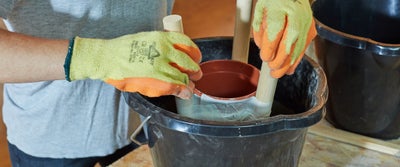
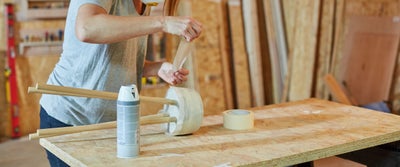
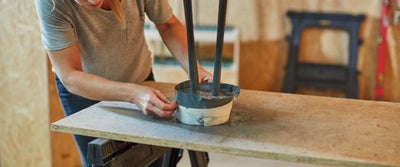
A setting template can help keep the legs perfectly stable during the curing process. We used an old plant pot, but you can use whatever you have to hand. To make the setting template, align the prepared dowels around your chosen template then secure in place with masking tape.

7.Building_concrete_stool.jpeg

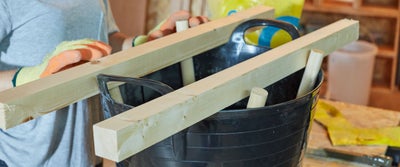
Using a supporting framework is another way to securely set the legs. Place offcut pieces of timber across the top of your bucket to hold your setting legs in place. If you like, you can secure the dowels to the timber with masking tape too.

8.Concrete_Stool_Creating_Setting_Template.jpeg

If you want to go for a more organic placement, position the legs into the concrete then secure the dowel by taping them to the side of the bucket with masking tape.

Whichever setting style you go for, don’t worry if the legs look like they’ve set a little unevenly. We’ll show you a number of ways to level things up later on.

Preparing the water and concrete mix

View instructions
9.Concrete_Stool_Concrete_Mix.jpeg

The concrete ratios and cure times will vary depending on the mix type and manufacturer you go for. Be sure to check the packaging instructions before starting to decide on the best mixing ratios.

10.Woman_holding_bucket.jpeg

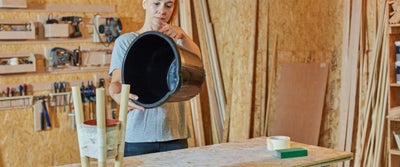
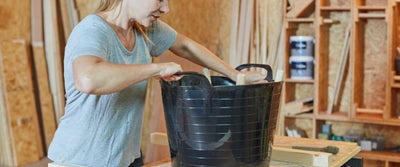
Give the inside of your container a good wipe down and check for any cracks or splits. We decided to use a plastic bucket, a plastic plant pot and a silicone bucket.
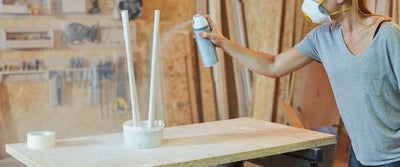
11.Building_concrete_stool.jpeg

Decide on the thickness of your stool. To do this, place your leg setting template in the centre of your empty container. To ensure the concrete doesn’t touch the template and set into your stool, put a piece of tape on the inside as a visual guide. If you’re not using a template, it can still be helpful to mark out the thickness using your dowel as a guide.

12.Building_concrete_stool.jpeg

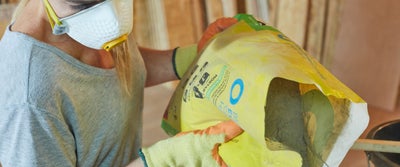
Now it’s time to add the concrete. Mixing concrete is dusty work, so be sure to put on a dust mask and gloves.
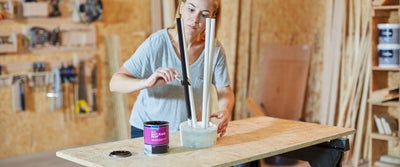
13.Concrete_Mix.jpeg

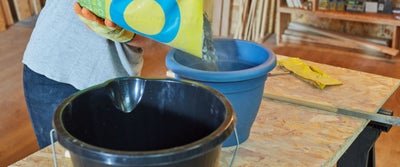
You can either measure out the cement mix by eye; weigh the bag and calculate the ratios; or transfer the exact amount of mix into another bucket.

14.Concrete_Mixing.jpeg

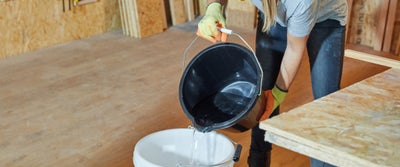
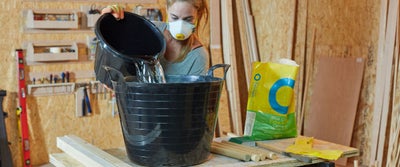
Once you’ve calculated the correct amount of cement mix, you will need to measure out the correct volume of water too. It’s a good idea to have a little extra water to hand in case the concrete begins to cure faster than you can mix.

15.Concrete_Mix.jpeg

Remove the template from the container if you’re using one, then pour in the cement mix up to your tape marker. Give the container a good shake to even out the surface.

16.Concrete_Mixing.jpeg

Now gently pour your water into the cement mix and begin stirring with your offcut or mixing implement.

17.Concrete_Mixing.jpeg

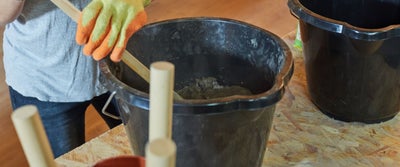
If you’re using rapid-setting cement as we did, you’ll need to work quickly and start mixing as soon as you add the water. The consistency should be that of a thick batter. Stir the mix thoroughly, being sure to scrape the bottom and sides to combine any clumps or residue.

Once you’re happy that the concrete has been properly mixed, give the container a couple of taps against your workbench to remove any air bubbles.

18.Concrete_Mixing.jpeg

Place your setting template into the mix or insert your dowel legs securing them to the container with your chosen method.

19.Concrete_Mixing.jpeg

Carefully set the stools aside. Most rapid-setting mixes will set within a couple of hours at room temperature, but we recommend leaving the mixture for 24 hours for a solid cure.

Removing the stools and sanding the base

View instructions
20.Building_Concrete_Stool.jpeg

Once the concrete has completely set, remove the stool from the bucket by gently pulling on the dowel legs. Depending on how large your design is the stool might be quite heavy, so have another pair of hands around if you need help.

21.Building_Concrete_Stool.jpeg

If you’re having trouble getting it out, try loosening the container slightly by stretching out the sides.

22.Building_concrete_stool.jpeg

If you used a setting technique, you can now remove the masking tape and template.

23.Building_concrete_stool.jpeg

Once you have removed your stool, place it with the legs facing up on your workbench.

24.Building_concrete_stools.jpeg

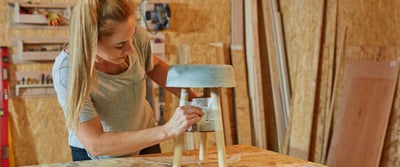
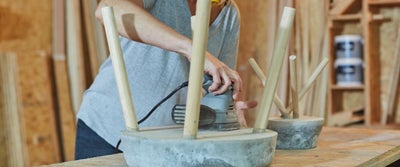
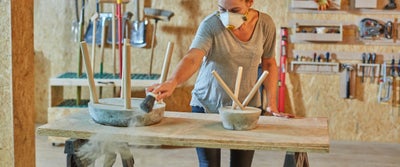
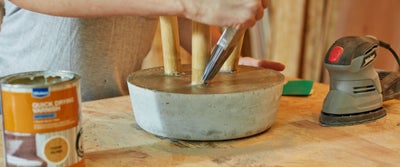
Using an electric sander and fairly coarse sandpaper, run the sander over the base of the stool to remove any imperfections. This will ensure that any rough edges are removed for a smooth finish. Remember to wear your dust mask and this can be a messy job.

25.Building_concrete_stool.jpeg

You may also need to remove concrete overspill from the base of the dowel legs. Use fine-grit sandpaper to carefully rub the dowel down by hand.

26.Building_concrete_stool.jpeg

Before applying any treatments, give everything a clear down using a dustpan and brush and damp cloth where needed.

Sealing with varnish

View instructions
27.Concrete_Stool_Sealing_With_Varnish.jpeg

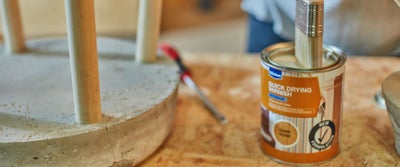
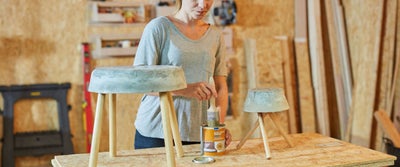
Now it’s time to varnish the underside and dowel legs of your stool. Varnish not only brings out the natural patterns and colour of both materials but also helps to seal the concrete, protecting the surfaces.

28.Varnishing_concrete_stool.jpeg

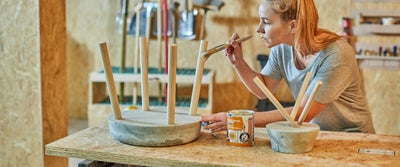
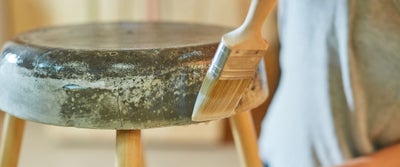
Using a paint brush, generously apply a couple of even coats of the varnish to each of the legs. We chose a gloss finish for its reflective properties, but the choice is entirely yours depending on the look you’re going for.

29.Concrete_Stool_Sealing_With_Varnish.jpeg

Then apply a coat of varnish to the base of the stool. Use your brush to work the varnish in well to any indents, bubbles or cracks as this will help to seal the surface, providing additional strength.

30.Concrete_Stool_Sealing_With_Varnish.jpeg

Give the varnish some time to dry, then carefully turn the bench over onto its legs.

31.Concrete_Stool_Sealing_With_Varnish.jpeg

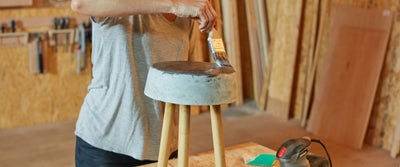
Working in the same way, varnish the top and sides of your concrete stool.

32.Concrete_Stool_Sealing_With_Varnish.jpeg

If there are any natural patterns or textures in the concrete, follow them with your brush working from the centre outwards. This will ensure you have an even and stroke-free finish.

33.Concrete_Stool_Sealing_With_Varnish.jpeg

As with the underside, work the varnish in well to any imperfections, to seal the surface.

34.Concrete_Stool_Sealing_With_Varnish.jpeg

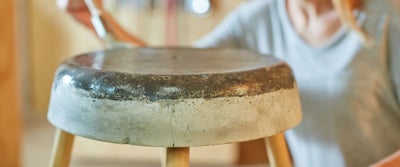
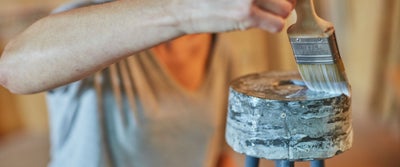
Concrete is an absorbent material so apply the varnish generously. We recommend applying multiple coats, allowing each to dry in between.

The concrete will get darker as you varnish, but don’t be alarmed as this is entirely normal. You’ll notice that the concretes textures and natural colours reveal themselves as the varnish dries.


Decorating the stool

View instructions

Sealing the concrete and dowel legs with varnish gives a lovely natural finish, however, the decorative options are endless. If you want to get creative with finishes, there are a whole host of ways to enhance your stool.

35.Concrete_Stool_Decorating_The_Stool.jpeg

We decided to paint the legs of one of our stools to enhance the colours and textures of the concrete.

36.Concrete_Stool_Decorating_The_Stool.jpeg

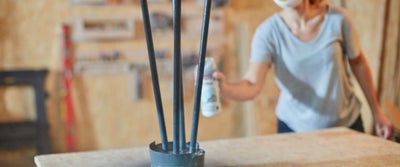
Start by masking around your stool to save any drips, splashes or overspray marks.

37.Concrete_Stool_Decorating_The_Stool.jpeg

We recommend priming timber before painting as this helps to create a smooth finish for other finishes to adhere to. We began by giving the dowel legs and base of the stool a good even coat with a spray paint primer.

38.Concrete_Stool_Decorating_The_Stool.jpeg

Once the primer dried, we gave the legs and base of the stool and couple of even coats of interior wood paint, using a paint brush to follow the direction of the grain.

39.Concrete_Stool_Decorating_The_Stool.jpeg

Once the paint had dried, we added a gradient effect to the stool using dark grey spray paint.

40.Concrete_Stool_Decorating_The_Stool.jpeg

When the gradient paint had dried, we finished off the stool by giving the legs a coat of spray lacquer varnish for a glossy shine.

41.Concrete_Stool_Decorating_The_Stool.jpeg

Leaving to dry, we then removed the masking tape pulling back at a 45 degree angle to avoid cracking or peeling the paint.

42.Concrete_Stool_Decorating_The_Stool.jpeg

We finished by giving the concrete top and sides a final coat of varnish to enhance the patterns and seal the surface.

Adding the feet

View instructions
43.Concrete_Stool_Adding_Feet.jpeg

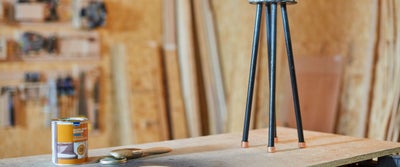
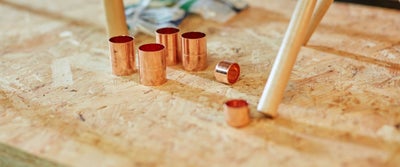
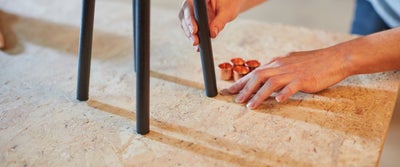
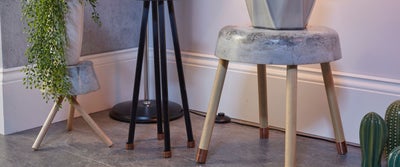
Using plumbers straight coupling or end caps as feet for your stool is a great way to complete the look.

They can also be useful for levelling out legs that are a little uneven. It can be worth giving any especially wonky legs a sand down before adding feet to make levelling that bit easier.

44.Concrete_Stool_Adding_Feet.jpeg

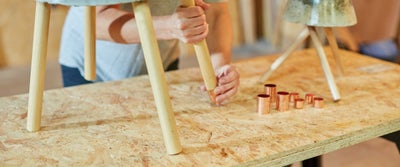
Choose coupling that is the same size or similar in diameter to your dowel legs. They should fit by twisting into place or glueing into position.

45.Concrete_Stool_Adding_Feet.jpeg

If you find you have a minor wobble, you can use a coin or a small washer to help level things out and give your stool a little extra height. Simply put them into the bottom of your end cap before slotting or glueing everything back into place.

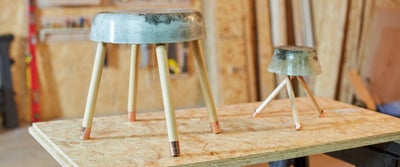
46.Range_of_concrete_stools.jpeg

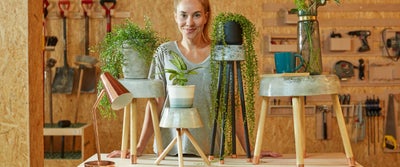
And that’s it, your DIY concrete stools are complete. Position in the perfect spot for your cup of tea, favourite plant or table lamp.

Aftercare

View instructions

If you notice that your stool is wonky at a later stage, simply use the coin or washer technique to level things out. Slot an extra coin into the coupling feet, or glue directly to the base of your dowel.

As the decorative possibilities are endless, you can choose to get creative with your stools at a later stage. Simply give everything a sand back to smooth down the surfaces, then varnish and paint for the perfect look.

Get creative with your concrete stools

View instructions
47.Concrete_stool.jpeg

Experimenting with different cement mixes and types of concrete is a good way to achieve different finishes.

Be experimental with your choice of container. Use a selection of buckets and differently shaped pots for interesting designs and unusual shapes.

Use different materials for the legs. Metal pin legs are a minimal and trendy choice, while old tool handles or mismatched offcuts as legs will make a fun talking point.

Get creative with the decoration. High gloss varnish and a lick of paint can go a long way to customising your designs. Match the colour of the legs to a room or varnish in the same colour as your floorboards.

You can even try painting the concrete tops or adding specialist cement dye to the mixture for bespoke colours. Try mixing up a small sample first, adjusting the colour until it’s just right.

Introduce touches of gold leaf or gold paint for a luxurious finish to the top of your stool. You can even use gold paint to practice your own golden repairs, highlighting accidental cracks or interesting textures.

Try using different styles and even objects as feet for the stool. You could even dip or paint the bottom of the dowel legs in a contrasting colour to the timber, using masking tape for crisp lines.

Concrete stool inspiration

View instructions
48.Concrete_stool.jpeg

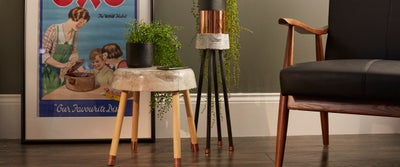
Use your stools around the house as an additional surface. A great feature in any room from the living room to the hallway, add a statement lamp as a standalone piece or use as an easy to reach table.

Arrange the stools in a bright window and top with your favourite plants, for a fun growing corner.

Position at the end of the sofa as an end table and use as the perfect spot for a cup of tea or cold drink.

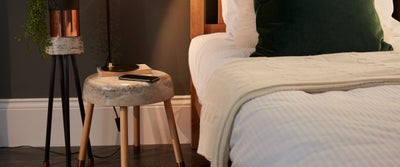
49.Concrete_Stool_by_bed.jpeg

Add an Anglepoise or table lamp and pile of a books for an attractive bedside table.

Scale the design and try making a concrete bench using a windowsill plant pot. Set legs into either end for secure and stylish seating.

Find our favourite ways to use your concrete stools and more inspiration for your home, in our ideas and advice hub.

More inspiration from Wickes