How to install a water butt
Having your own water butt not only helps you save yourself money on water but also helps you do your bit for the environment by simply recycling rainfall for your outdoor water needs. Installing a water butt is a relatively simple task if you have basic DIY knowledge and the correct guidance.
Method
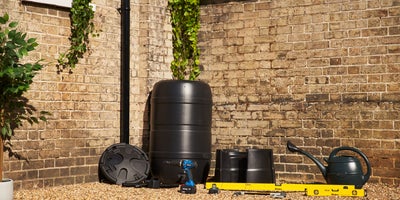
Begin by creating a safe working space around where you’d like to fit your water butt by removing furniture and any other obstacles. Make sure you choose an area next to an already installed downpipe.

If you’ve chosen to install it on top of gravel/stone, use a rake and spirit level to ensure the ground is level before making a start.

First, bring the water butt stand over to your safe working space and place it where you would like your water butt to sit.

Place a spirit level on top of the stand to check it is level before moving on.

Now, bring your water butt over and place it on top of the stand.

Use a tape measure to ensure the water butt is situated no more than 50cm from the downpipe.

With the distance checked, it’s time to attach your hole saw drill bit to your combi drill. Now drill a hole into the outlined hole on the side of the water butt. For this video we used a 27mm hole saw drill bit, but you should use whatever is appropriate for your rainwater filter pipe.
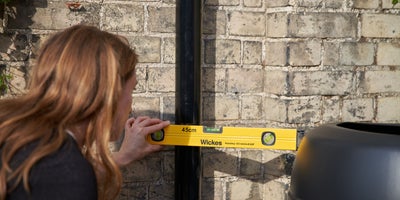
Now the hole has been made, place a spirit level in line with the bottom of the hole and the downpipe.

Use a pencil to make a marking on the downpipe.

Measure 2.5cm up from the marking you’ve just made and make a second pencil marking.

Using a combi drill, remove any downpipe bracket near your markings to allow for the pipe to be pulled slightly away from the wall.

Now use a hacksaw to cut the downpipe between these two marks to remove the 2.5cm section.
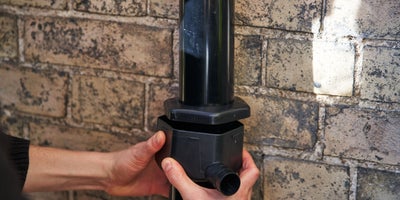
Insert the rainwater filter in place of the removed section of the downpipe. Slide the filter lid onto the top section of the downpipe and push it up out of the way.
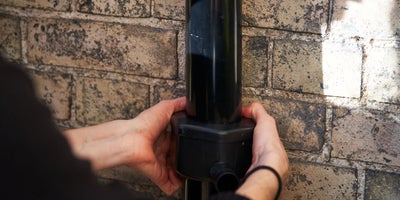
Place the filter base on the lower part of the downpipe. Now, slide the top section back down so it can be clicked into the base.
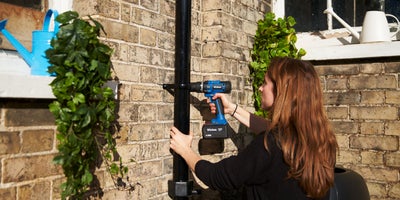
If you had to remove a downpipe bracket, you can now re-secure this to your wall and downpipe.

With the rainwater filter fitted, secure the hose connector through the drilled hole on the water butt.

Then, attach the flexible hose from the filter kit to both connections in the downpipe and the water butt. If it’s too long this can be cut to size using the hacksaw.

Once the flexible hose is in place, secure the lid to the top of the water butt.

And there you have it, now all you have to do is wait for the rain to fill up your water butt, top up your watering can and away you go.

The water from a water butt is ideal for watering plants, top up the pond or even wash your car.
