Skip to content Skip to navigation menu
Basket
0

Planning & preparation

  • We are going to show you how to build a decking sandpit, step by step.
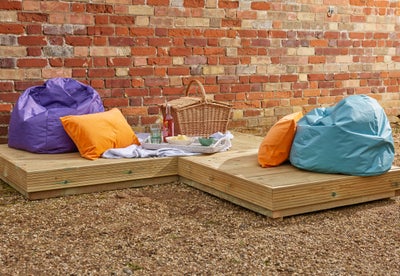
  • It gives you a space that can be utilised by both parents and children alike, with a convertible design.
  • The modular design lets you expand it to suit your space, so you can go as big or as small as your garden allows.
  • When it comes to the design and size of your sandpit, it’s up to you. We’re showing you how to build one module, but everything can be changed to suit your needs.
  • It should take a DIYer with moderate experience around an hour to build one module.


      Staying safe

      • Always make sure that your power tools are unplugged while you’re setting them up or changing accessories, to ensure your safety.
      • Keeping the plug in-sight acts as a visual reminder to prevent accidents and hazards.
      • For extra safety when using power tools and painting, be sure to wear protective equipment, including your ear defenders, goggles and dust mask.


      Deciding on size and design

      The size of one of your modules is dictated by your paving slabs, which provide the base for your sandpit.

      We used four 450mm by 450mm squares to create a larger square, which when combined with the 50mm width of our timber, gave us a one-metre by one-metre module.

      Work out what the size of your one module will be, and then use this to figure out the overall scale of your decking when you consider how many modules you want to combine.

      You’ll also need to think about which modules will house your sandpit and how big you want to make it. Thanks to its modular nature, you can build all the components in your shed, garage or workshop and then construct them at the final location.

      Building your frame

      View instructions

      Because the frame goes around your paving slabs, its size is completely dependent on the size of the base.

      Measure the length and width of your slabs when they’re laid in position and use this to cut your timber boards to size.

      Once they’re cut, lay them in position so that they’re butted up against each other around your paving slabs.

      Screw your frame together through the butt joints and you’ve got the basis for your sandpit.

      Constructing your deck

      View instructions

      Cut your decking boards to size according to your frame.

      Lay your cut boards in position and cut your first baton to size. The batons will lay across your decking boards and hold them all together, but need to be far away enough from the edges that they fit inside the frame.

      Once you have your first baton cut, use it to mark and cut your second, then lay them in position on opposite sides of your lid.

      Screw them into each decking board to hold them in place, before flipping it over and dropping your lid in place.

      For the modules you’re not using as a sandpit, you can screw the lid into the frame to prevent it from moving around at all.

      Finishing touches

      View instructions

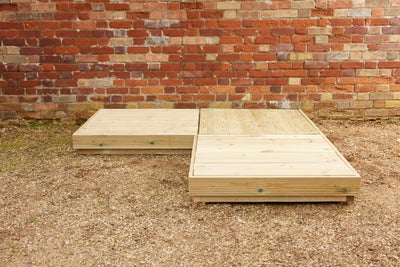
      Once you’ve built all of your modules, you can take them to your final location and lay them in place.

      250221_ABC3_B2_SandPit_0414.jpg

      Start by laying your paving slab base before placing your completed decking module around it.

      250221_ABC3_B2_SandPit_0423.jpg
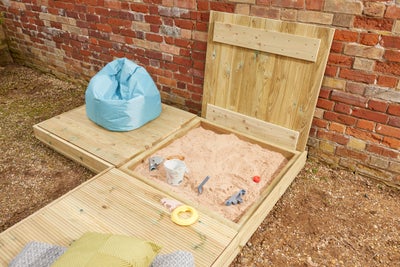
      Fill your sandpit with your sand and place the lid over the top. You can either leave this as it is, or you could add a hinge or handles or even both for easier access when it’s playtime.

      To finish off the look of your deck, add decking boards around the outer perimeter as a fascia that covers over the frame.

      250221_ABC3_B2_SandPit_0438.jpg

      And there you have it, the start of your very own modular decking sandpit. It’s the first step in creating a convertible deck that has a little something for everyone.

      For more ideas, advice and DIY how-to guides, visit the inspiration hub; and share your #WithWickes project with us online.
      More inspiration from Wickes