Skip to content Skip to navigation menu
Basket
0

Planning & preparation

  • Here we will show you how to replace common types of handles on wooden doors, and how to replace fasteners and stays on wooden casement windows
  • Door and window furniture comes in a wide range of designs, colours, sizes and finishes so be sure to consider the range and choose a design that best suits your room
  • Whilst it is possible to cover holes and marks left behind from the previous door or window furniture, it’s much easier to choose a replacement that is the same size so it covers the marks
  • Bear in mind that different products may have different fitting requirements, so be sure to always check the manufacturer’s instructions
  • uPVC doors and windows are often supplied with handles and locking mechanisms that are not designed to be easily changed. Be aware that drilling or screwing into uPVC frames may invalidate the manufacturer’s warranty

Do it right

  • Clearly mark the position of your fixing points and drill pilot holes to ensure accuracy
  • Be sure to only use screws that are provided by, or recommended by, the manufacturer
  • When changing a casement window stay on an accessible window, consider improving the security of the window by using locking casement stay pegs instead of those supplied with the stay
  • If you are fitting a casement window fastener, rather than replacing an existing one, position it so that the latch is about halfway up the window frame
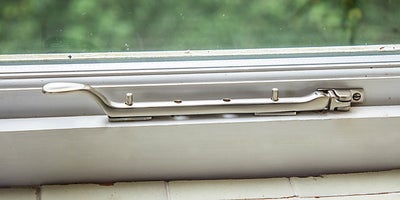
  • Casement window fasteners are usually supplied with both a hook fastener, for use when the window shuts flush to the frame, and a mortice stop, as used here
  • If fitting a casement window stay, rather than replacing an existing one, position the stay centrally with its hinged fixing on the same side as the window’s hinge

Staying safe

  • Always wear safety goggles when drilling, sawing or using a chisel
  • When using a chisel, be sure to chisel away from the body

Aftercare

  • When cleaning door and window furniture, only use products that are suitable for their material and finish, as using the wrong product could cause permanent damage

Replace a door handle

Step 1

With the door held open, remove the old door handles. Any screw holes in the door that will not be covered by the new handles will need to be filled, sanded and painted over.

1.How-To-Change-Door-Window-Furniture-Door-Handle.jpeg

Step 2

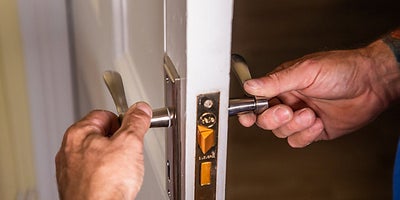
Replace the old spindle with the new one.

2.How-To-Change-Door-Window-Furniture-Door-Handle.jpeg

Step 3

Gently push the new handles into place. If they don’t touch the door on both sides, the new spindle is too long and will need to be cut to length with a hacksaw.

3.How-To-Change-Door-Window-Furniture.jpeg

Step 4

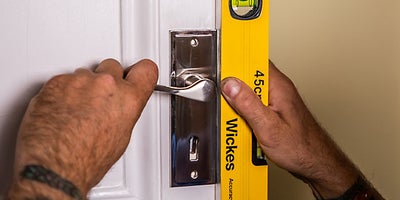
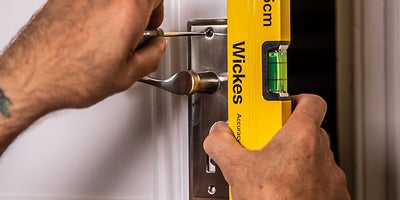
Use a spirit level to check the sides of the handles are vertical.

4.How-To-Change-Door-Window-Furniture-Door-Handle-4.jpeg

Step 5

Mark the position of the new screw holes with a carpenter’s awl.

5.How-To-Change-Door-Window-Furniture-Door-Handle-5.jpeg

Step 6

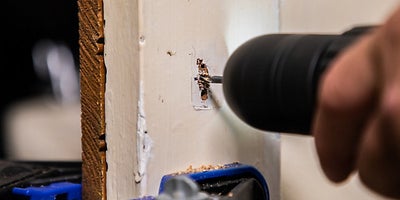
Remove the door handles and drill pilot holes.

6.How-To-Change-Door-Window-Furniture-Door-Handle-6.jpeg

Step 7

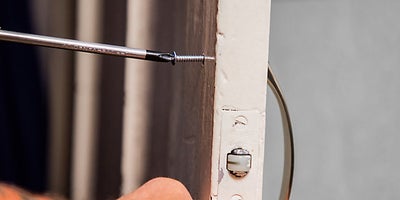
Finally, screw the handles into place using the provided screws. Take care not to scratch the handles when fixing them.

7.How-To-Change-Door-Window-Furniture-Door-Handle-7.jpeg

Replace a pull handle

Step 1

Unscrew the old knob or handle. If possible, plan the position of the new handle so you can re-use or cover the existing holes. Otherwise, these will need to be filled, sanded and painted over.

8.How-To-Change-Door-Window-Furniture-Pull-Handle-1.jpeg

Step 2

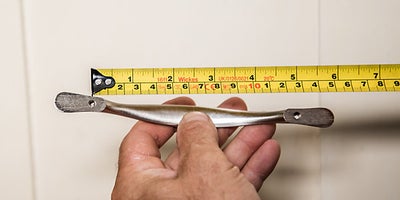
Measure between the centres of the two holes on the new handle – this distance may be stated on the packaging.

9.How-To-Change-Door-Window-Furniture-Pull-Handle-2.jpeg

Step 3

Mark the position of where the two holes will be on the front of the door. Connect the marks with a spirit level to check that the handle will be exactly vertical.

10.How-To-Change-Door-Window-Furniture-Pull-Handle-3.jpeg

Step 4

Clamp a block of wood behind the door, then use a suitable drill bit to drill two holes through the marks into the block. Remove the clamp and smooth the hole with sandpaper if necessary.

11.How-To-Change-Door-Window-Furniture-Pull-Handle-4.jpeg

Step 5

Finally, fix the handle into place using the screws supplied.

12.How-To-Change-Door-Window-Furniture-Pull-Handle-5.jpeg

Replace a casement window fastener

Step 1

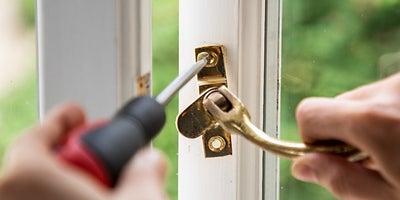
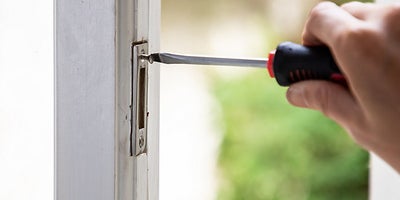
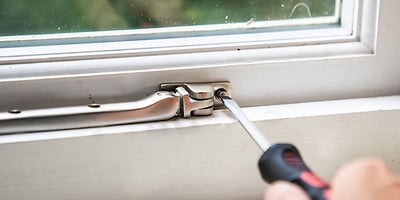
Remove the old casement fastener and mortice stop (or hook). Re-use the existing holes if possible. Otherwise, these will later need to be filled, sanded and painted over.

13.How-To-Change-Door-Window-Furniture-Casement-Fastener-1.jpeg

Step 2

If you need to make new holes, place the fastener in position, with its catch in the mortice (hole) if possible. Then, use a pencil to draw two pilot hole guide marks.

14.How-To-Change-Door-Window-Furniture-Casement-Fastener-2.jpeg

Step 3

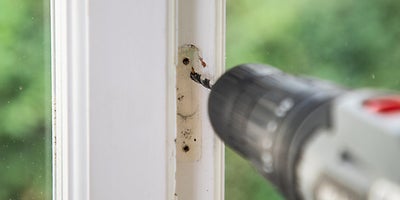
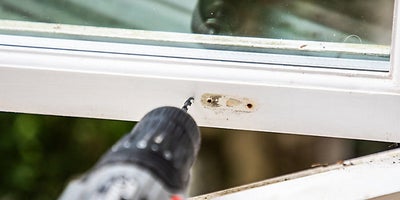
Open the window so that the drill doesn’t mark the frame, then drill the pilot holes. Close the window and screw the fastener into place with the provided screws.

15.How-To-Change-Door-Window-Furniture-Casement-Fastener-3.jpeg

Step 4

If the catch doesn’t fit into the existing mortice, use a chisel to adjust the hole as necessary.

16.How-To-Change-Door-Window-Furniture-Casement-Fastener-4.jpeg

Step 5

When the catch fits, position the new mortice stop, mark and drill two pilot holes and secure it in position with the provided screws.

17.How-To-Change-Door-Window-Furniture-Casement-Fastener-5.jpeg

Change a casement window stay

Step 1

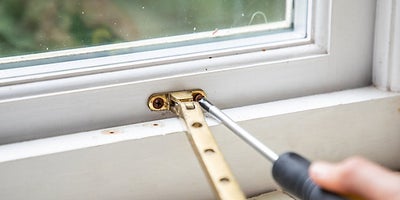
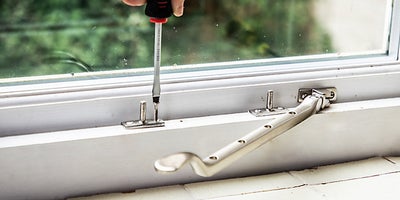
Remove the old casement stay and pegs. Re-use the existing holes if possible. Otherwise, these will later need to be filled, sanded and painted over.

18.How-To-Change-Door-Window-Furniture-Casement-Stay-1.jpeg

Step 2

To make new holes, put the stay into position, then use a pencil to draw guide marks for two pilot holes.

19.How-To-Change-Door-Window-Furniture-Casement-Stay-2.jpeg

Step 3

Open the window so that the drill doesn’t mark the frame, then drill the pilot holes.

20.How-To-Change-Door-Window-Furniture-Casement-Stay-3.jpeg

Step 4

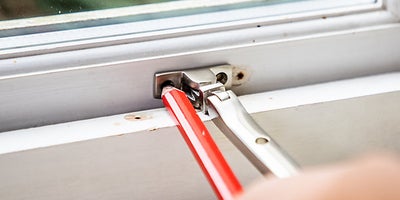
Close the window, position the stay and secure it in place with the provided screws.

21.How-To-Change-Door-Window-Furniture-Casement-Stay-4.jpeg

Step 5

Then, put the two pegs into position, through the first and last holes on the stay, and adjust them slightly so the stay can rise and fall without knocking the pegs.

22.How-To-Change-Door-Window-Furniture-Casement-Stay-5.jpeg

Step 6

Use a pencil to draw the pilot hole guides for the first peg, drill, then secure the peg in position with the provided screws. Double-check the position of the second peg before fixing it in the same way.

23.How-To-Change-Door-Window-Furniture-Casement-Stay-6.jpeg